War 114 | Able
0
0
0
0/0
0/0
0
0
0
War 114 | Able
0
0
0
0/0
0/0
0
0
0
View Tools
Distance: 150m Azimuth 40
Enter Invite Code
Support
Thank you for visiting FoxholeHQ! My name is TreeSugar and I've been working on this website for a while now and I couldn't have gotten this far without the people who supported this project. If you enjoy the tools I've created and would like to support me you can do so by joining my Discord, donating on Ko-Fi, or becoming a Patreon!
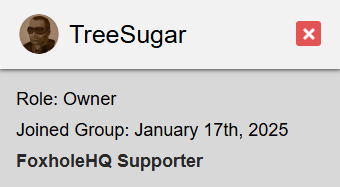
Users who donate on Ko-Fi or become a Patreon will receive a special role on FoxholeHQ that will be visible to other users, this is a small thank you to the people who are supporting.
(Donations must be a minimum of $1 to qualify for the role)
If you'd like to support in a different way you can do so by spreading the word about FoxholeHQ, you can also send a commend if you see me ingame!
To claim your role after you support you can visit the discord and send me a message with your Username and proof of purchase.
Tools Tutorial
The Tools section of the map provides a few useful things a player might find interesting, the main features of this section are the Measurements and Drawing tools.
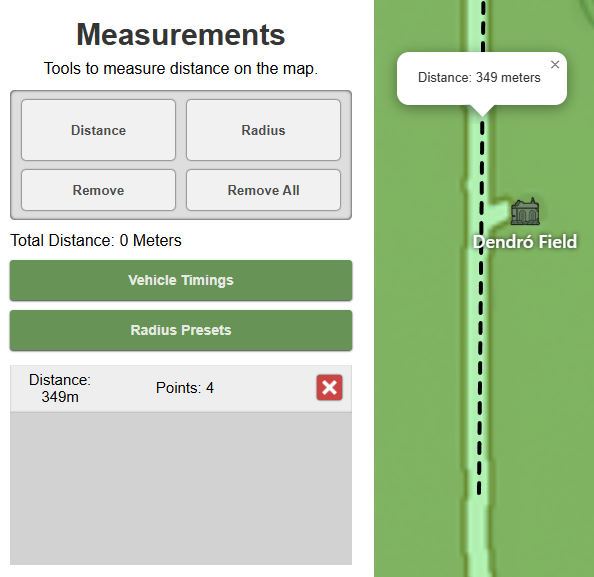
The Measurements section allows you to calculate distance on the map by drawing a line and receiving the distance in Meters. You can also use the Radius tool to find the distance of a radius on the map.
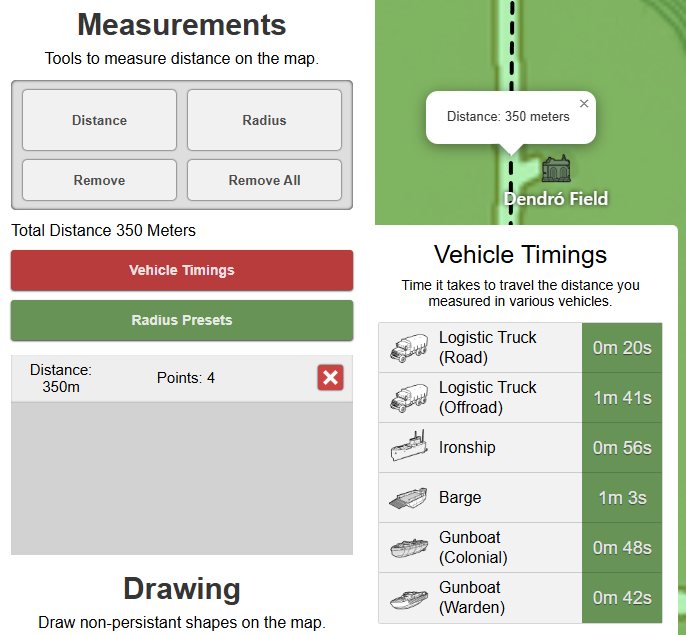
When calculating distances on the map you are able to see the total amount you have calculated in the Total Distance section. Just underneath the Total Distance is the Vehicle Calculations, this button opens a panel that will tell you how long it would take to travel that distance in various vehicles. In the panel underneath the button is a section where you can see your previously drawn distance markers and the option to delete each one, each marker also tells you how many clicks it took to draw that marker (Points).
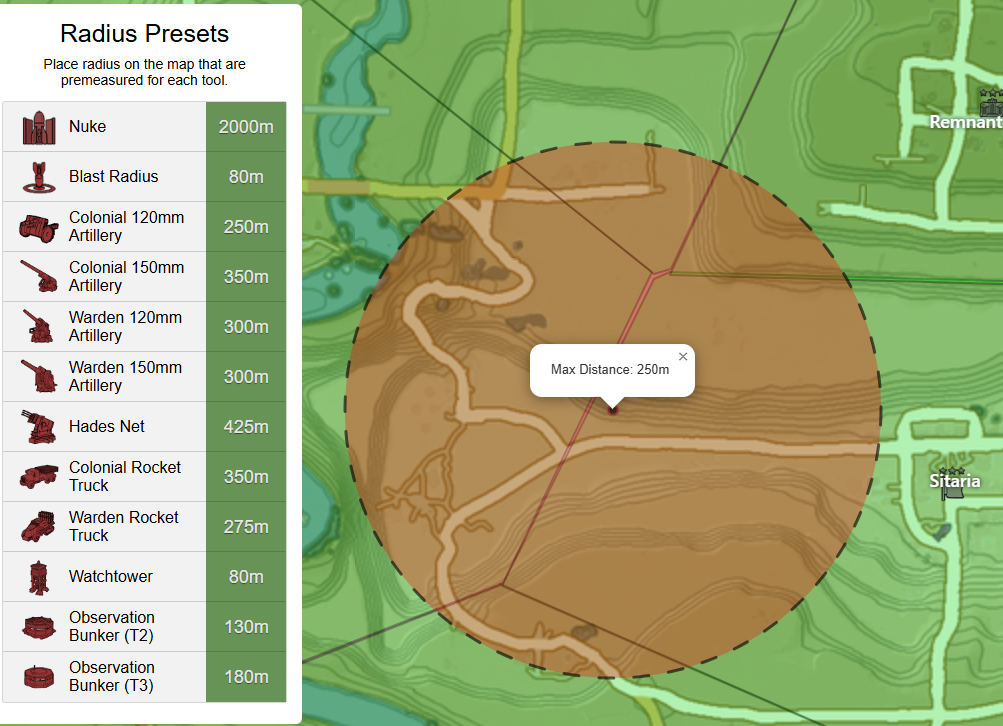
The Radius Presets panel allows you to select different preset radius that allow you to see how far each item in the list can reach. This is useful if you want to see if placing a artillery piece in a specific spot would reach the town hall or other possibiltiies.
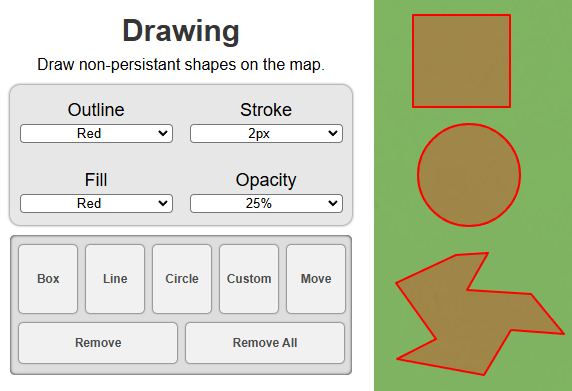
In the Drawing section you can draw non-persistant shapes on the map which will not stay after you refresh the webpage. The customization panel allows you to change the look of the markers you are creating. Underneath the customization are the different options you have to make shapes such as a Box, Line, Circle, Custom, or the option to Move, Remove or Remove All.
Stats Tutorial
The Stats section of the website goes over various information about the current war that you are viewing and has some information that users may find useful. The War Statistics changes based on what shard you are viewing, if you'd like to view another shards statistics you can switch it by using the shard panel in the top right.
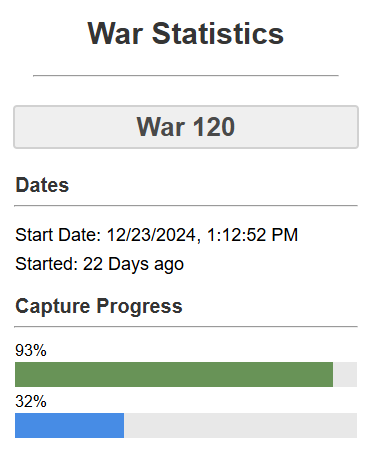
The first half of the Stats section provides basic information about the war such as War Number, Start Date, Active Days, and the Capture Progress. The Capture Progress is based on how close the team is to the required Victory Points.
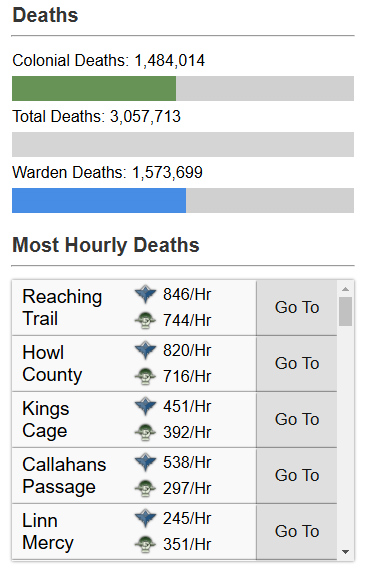
The second half of the Stats section provides information about the current wars death statistics, this is where you can find useful information. Deaths section tells you how many deaths have occured during the war and shows how many deaths for each faction. The Most Active Regions tells you what regions are the most active and has the most hourly deaths, this is great if you quickly want to see where the action is taking place. The Go To button will also take you directly to that location on the map. Most Active Regions updates every IRL hour.
Markers Tutorial
The Markers section of the panel is the main feature of the FoxholeHQ map, this section allows regiments, small groups, and solo's to create a group, invite others, and share markers with each other. These are private groups in which there are specialized roles such as Owner, Officer, and Member.

In order to begin using the Markers you must either create an account or log in with an existing account. This account will be able to join multiple groups using a specialized code created by the group owner.

Once you are logged in you can access the Create/Join options on the page, if you are wanting to create a group you can click on Create, or if you were invited with a code you can click on Join.
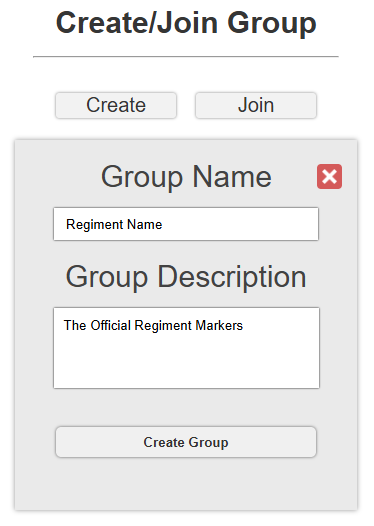
When the Create Panel opens up, insert the required information about your group. The Description can be left blank however the group must have a title.
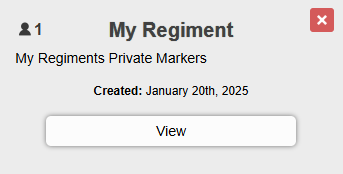
You can either click View to enter the group or click the red X in the top right to remove the group from your account.

This is the view you will have when you first enter your group that you just created. The group has two main sections, Markers and Members. In the image marked 1 is your refresh button, this should be pressed whenever you want to refresh the group when a new member joins/leaves, a new marker was created/edited/deleted or any other changes. The number 2 is the button you press when you want to create a marker, this will open up another panel which we will go more into detail soon. Number 3 is to invite members by generating a members code, we will also go more in detail with that as well.
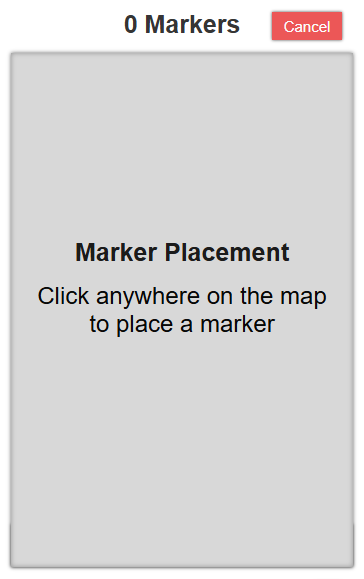
Once you click the Create Marker button you will be prompted to click on the map, anywhere you click is exactly where the marker will be placed.
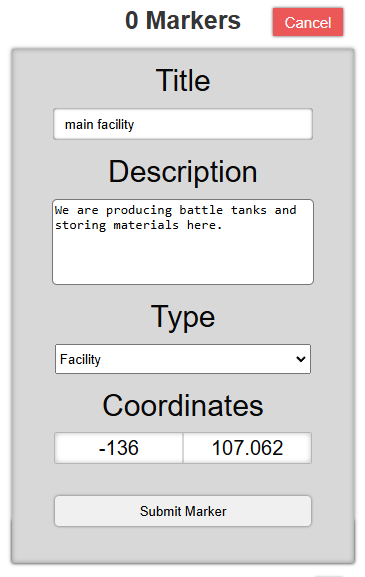
As soon as you click on the map, the section will update with a place for you to input information about that location. After you have inserted your information you can click Submit Marker to finish.
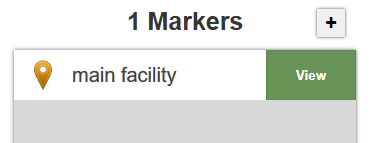
The page will then refresh and you will be able to see your brand new marker. To view the contents and location of the marker you can click on View, this will open up the information about the marker and teleprot your screen exactly where the marker is placed.
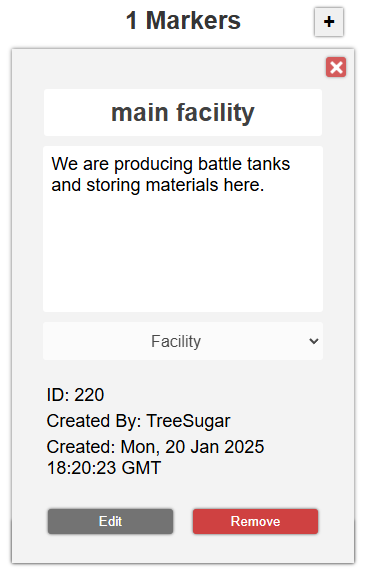
This is what the marker looks like when its being viewed, in here if you are a Owner/Officer you can edit or remove the marker.
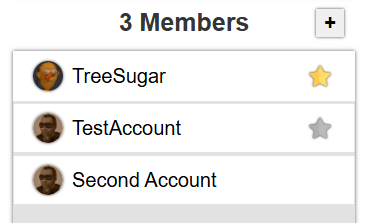
Moving onto the Members section there are a few roles to go over:
Owner (Gold Star): The Owner role is the person who created the group and has the most permissions in the group. This role can Create/Edit/Remove Markers, Promote/Demote/Kick Users, and Generate/Remove Invites.
Officer (Silver Star): The Officer role is given by the owner and has pretty similar permissions to the Owner. This role can Create/Edit/Remove Markers, Kick Users, and Generate/Remove Invites. This role CANNOT Promote/Demote.
Member (No Star): The Member role is given by default by joining the group using an invite code, Member roles only have the permission to view markers.
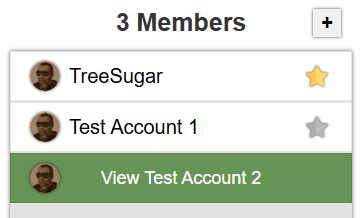
Useres can hover over each other and view their profile, higher ranks can also use this section to manage the users in their group.
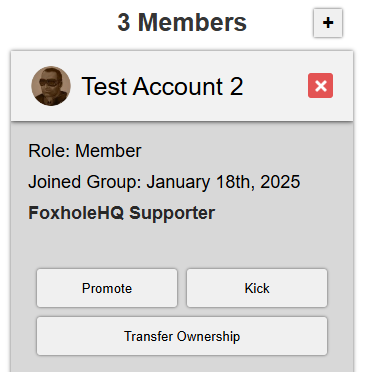
When managing users you can Promote/Demote if Owner and Kick if Owner/Officer. You can also see the users role and when they joined.
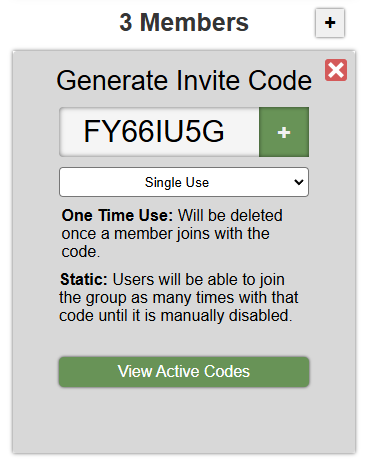
The button next to the Members section is used to invite members, this will open the Generate Invite Code panel. This section will allow Owners/Officers to generate a code that can be used by other users. This code can be created to be a Single Use code which gets deleted after use or it can be a Static code which will not be deleted after use.
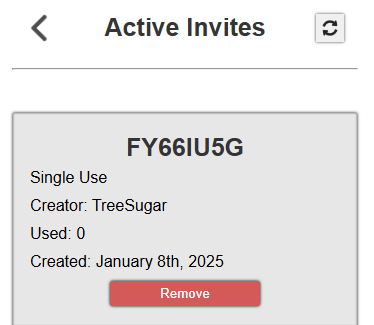
If you click on the View Active Markers button, Owners/Officers can see what invite codes are currently active and can remove them to stop anyone from using them if they wish.
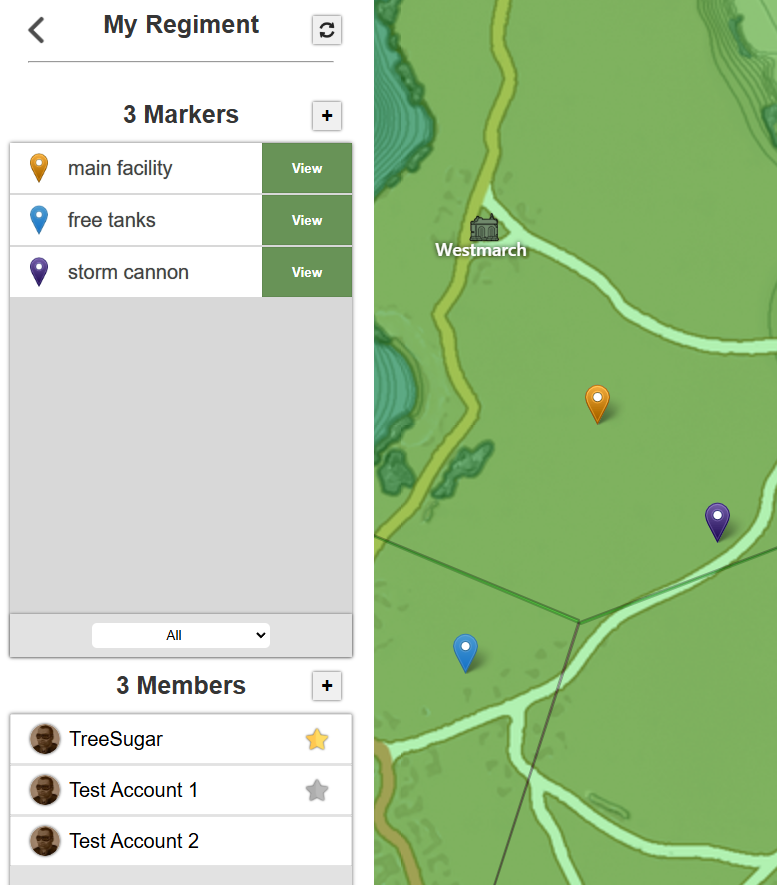
That covers most of the Markers, with this you can share customizable markers with your team mates and update them whenever you would like.
Map Tutorial
The Map section of FoxholeHQ is designed to have control over different aspects of the map to fit your needs. This section is broken down into two sections, Map Options and Map Icons.
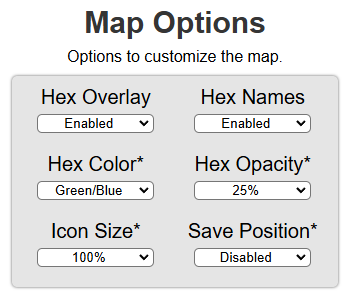
Map Options has the ability to change the settings of the map, this is useful if you do not like the look of the map or prefer to have it customized in your own way. A list of what each setting does is listed down below:
Hex Overlay
This setting will allow you to enable or disable the overlay that shows each teams captured regions.
Hex Names
This setting will allow you to enable or disable the Major Hex Names (Example: Deadlands) and Minor Hex Names (Example: Fort Duncan)
Hex Color
This setting will allow you to change the color of the regions captured by both teams, this is useful if you're tired of the colors or have issues viewing the map due to color blindness.
Hex Opacity
This setting will allow you to change the opacity of the hexagon overlay and will hide the underlying map the more you decrease the opacity and reveal more by increasing the opacity. This will also make the Hexagon Overlay much more visible if you're having issues telling the difference between both sides.
Icon Size
This setting will allow you to change the size of the Icons that are displayed on the map.
Save Position
This setting when enabled will save the last position that you were at when using the map and will set your position back there when revisiting the map.
Clicking the Save Changes button will save the settings so the next time you revisit the page everything will be the way you left it. Saving Changes however does require the page to be refreshed.
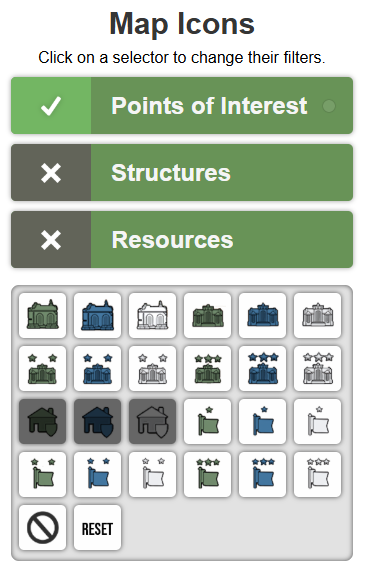
Map Icons is a section where you can set the icons to be the ones you are only interested in, this gives you granular control over what category of icons and specific icons to view.
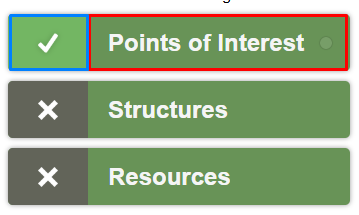
The top section with the green bars is where you can enable/disable each category and select which category to edit. Clicking in the BLUE box will enable/disable the category which will hide it from the map. Clicking in the RED box will open the filters for that category in the next section.
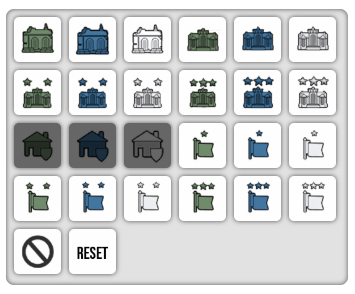
The lower section of Map Icons is where you can click on each icon to disable/enable the filter. This filter can be inverted by clicking the circle with a line straight through it or reset with the RESET button.
Start Date: 2/11/2025, 12:59:59 PM
Started: 30 Days ago
Winner: N/A
Alert
This is a notification card.
Measurements
Tools to measure distance on the map.
Total Distance: 0 Meters
Vehicle Timings
Time it takes to travel the distance you measured in various vehicles.
Logistic Truck (Road)
0m 0s
Logistic Truck (Offroad)
0m 0s
Ironship
0m 0s
Barge
0m 0s
Gunboat (Colonial)
0m 0s
Gunboat (Warden)
0m 0s
Radius Presets
Drawing
Draw non-persistant shapes on the map.
Outline
Stroke
Fill
Opacity
War 114
Start Date: 12/23/2024, 1:12:52 PM
Day 284 | Started 6 Weeks Ago
Winner: N/A
Capture Progress
0%
0%
Deaths
Colonial Deaths: 0
Warden Deaths: 0
Total Deaths: 0
Most Active Regions
Options to customize the map.
Click on a selector to change their filters.
Points of Interest
Structures
Resources
Active Invites
Are you sure you want to delete ALL markers?
Management Tools
test
TreeSugar
Transfer Ownership
Are you sure you want to transfer Group Ownership to TreeSugar?
Username:
Role:
Joined Group:
Generate Invite Code
One Time Use: Will be deleted once a member joins with the code.
Static: Users will be able to join the group as many times with that code until it is manually disabled.
Edited Logistic Order: Test Order 123
2 Hours Ago
Edited Logistic Order: Test Order 123
2 Hours Ago
Choose a Marker Type
Click on the map to place a marker
Title
Description
Type
Coordinates
0
0
Click on the map to place Radius Marker
Select Radius Marker
Create a Route
Route list is currently empty.
Click on the map to create your route.
Route Information
Route Name
Route Description
Click on the map to make a custom shape
Title
Description
Type
Color
Outline
right click points while editing to remove them
Storage Location
Are you sure you want to delete this Storage Location?
Title
Description
Code
User:
Username:
Created:
0 Logistic Orders
0 Storage Locations
Create Logistic Order
Title
Description
Code
Location
Click on the map to place the marker to show where the storage location is located at.
Title
Description
Order
Set Item Amount
Destination Stockpile
No contributions have been made yet.
Member Contributions
List of crates added to this logistic Order
Are you sure you want to undo your order?
Are you sure you want to delete the logistic order?
Logi Name
User:
Username:
Created:
Total Crates: 0 / 1
How many crates did you submit to the destination?
Argenti Rifle
Argenti Rifle
Argenti Rifle
Argenti Rifle
Deposit Location
Umbral Stockpile
Storage Code: 1234
Create Marker
Change Display Name
Setting a display name will change the appearance of your username to your group. Other users will still be able to see your actual username.
Are you sure you want to delete your group?
Group Name
Group Description
Delete Group
Delete your group and all the markers/members associated with it.
56
User:
Username:
Created:
Type:
Max Distance:
Join Group
Group Name
Group Description
asdfasdf
No Description
Created: Wed, 01 Jan 2025 01:46:03 GMT
Leave Group
Are you sure you want to leave
Login or Register to be able to place markers on the map.